This is a way I use to to debug my griffon apps since before ide support. I am using this with idea 8, but I think it can be used with every ide. I think Eclipse can run griffon apps like this.
I was looking at the new support from IntelliJ and Netbeans and it looks great. But I think the way I am going to describe also has benefits.
Let's begin from scratch.
So these are the steps:
1. Create an empty project in Idea.
2. Create your griffon application somewhere on the hard drive.
griffon create-app demo1
Ok, now we have an empty project and an empty app.
3. We will add the app in idea as a java module.
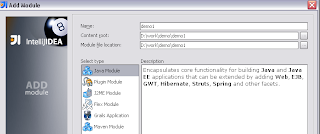
On the next screen we choose not to create a source directory. Click next, do not add any facets and finish.
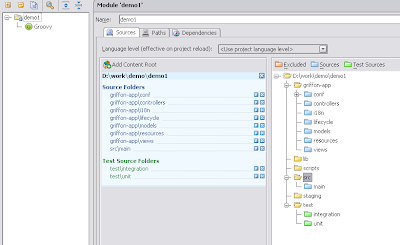
4.Next we set up the sources folders for our project. It should look like in the picture. The blue folders are sources. The green one are test sources.
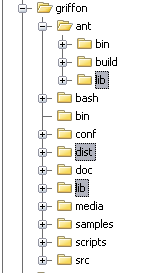
5. Let's add the griffon libraries to our module. Basically what I do here is add all the jars from the folders containing jars from %GRIFFON_HOME%. These one are the ones highlighted below
Also add the groovy facet will add the groovy libraries.
In the end it should look like this:
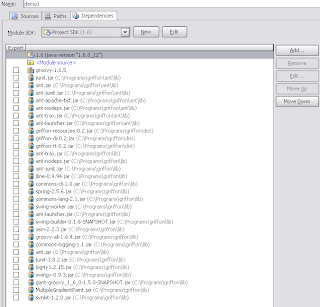
6. Now you should be able to compile your code. The code will be compiled somewhere on the drive, probably in the global path for that project. Find that place and copy application.properties from the module root (application folder) there. In griffon 1.x this was not necessary.
7. Now we create a run configuration
Create a Run/Debug Configuration of type application.
It should look similar to the one below
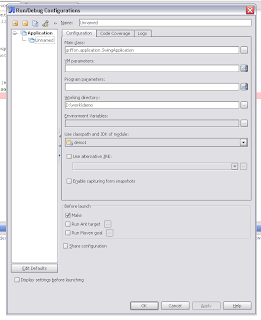
The main thing here is to set
griffon.application.SwingApplication as "Main Class". In griffon 1.x this was
griffon.application.SingleFrameApplication. I guess you can use that too.
You are done. Now you can run the app from the run button in Idea. Debug works also. And You can also use the wonderful hot swap to recompile your controllers or classes. I think it doesn't work for views.
If you use the basic idea behind this steps, I guess you can run/debug griffon using any IDE.
Simple, right ?


Comments
Post a Comment